How to exchange Ethereum or USDC in your metamask wallet directly into hex:
|
Assuming you've already installed the metamask wallet or followed the tutorial, let's address how you can acquire HEX from uniswap, a decentralized exchange. This is an incredibly simple way to acquire HEX, and I found the process to be very intuitive. Unis
STEPS: 1. Log into metamask. NOTE: If this is your first time using metamask and uniswap to get HEX, please refer to step 5 to learn how to add the HEX token address to your metamask wallet. This will prevent confusion of the first time question of "I don't see my coins! HELP!!!!" 2. Go to hexdex.win 3. Click the amount of ethereum that you want to be transform into HEX. This is shown in the picture below as an example. Keep in mind the price slippage amount on uniswap. I will talk more about this in step 4 below. 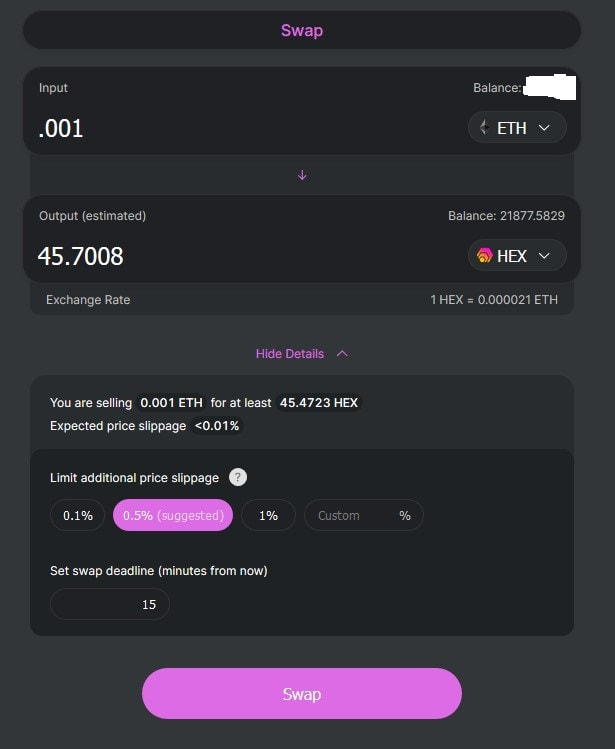
4. One thing to keep in mind is the price slippage on uniswap. The default is 0.5%. Price slippage will result in a less amount of coins for a higher probability of your transaction not failing on uniswap. If you're placing a big order, it might be worth it to consider changing it to 0.1% to make sure that you do not miss out on coins unnecessarily. If it's a big transaction, a few pennies on the dollar for an ethereum gas fee will be trivial if your transaction fails than a possible 0.5% price slippage. You can always try the transaction again.
5. Now that you've clicked swap, a box will that is shown in the bottom picture. The box below will show what happens when you click the swap button on uniswap. You can see the gas fee is pennies on the dollar. Go ahead and click confirm if you want to begin your transaction. Click reject if you're not ready. 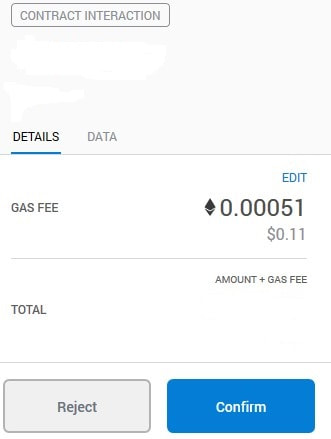
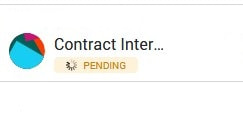
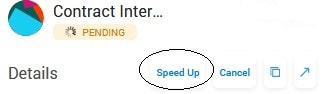
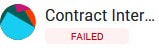
6.) Assuming you clicked confirm, you can now see in your metamask wallet that the contract interaction is pending. This will appear as such in the image below.
7. This will show pending until the transaction is complete. You can select to speed up the transaction if you see that it is taking too long and want it to be completed as soon as possible. This will appear like so in the image below.
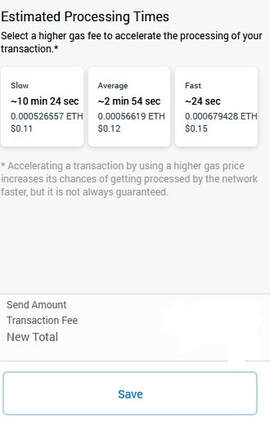
8. When you speed it up. Another box will appear, asking you if you want a slow or fast transaction, along with the fees associated with them.
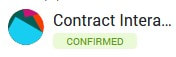
8. Whether or not you decided to speed up the transaction by paying a little bit more ethereum in gas fees, after some time, you will see that the transaction is confirmed (hopefully) or failed. This will appear as one or the other. You can also confirm that your transaction is complete by viewing it on etherscan.
|
|
9. Now that you've transacted, or if you skipped from step 1 to step 9, you'll need to add the HEX wallet address to your metamask wallet in order to see your balance. To start, click your metamask icon and select the dropdown in the upper left corner

10. After clicking the dropdown, you should see something that looks like this, although HEX may be missing. Click the "add token" part where it says "Don't see your tokens?" This will lead you to the next screen.
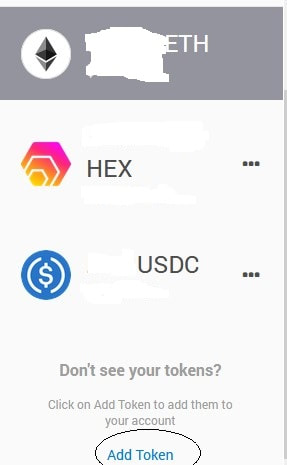
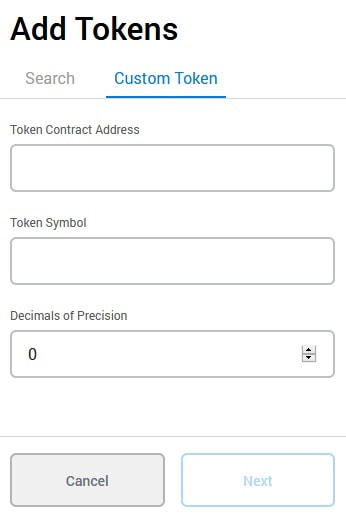
11. After clicking "add token," you'll see that you can either search for the coin or enter the contract address. At the time of writing this, HEX does not show up in the search bar on metamask. If you still can't find this by the time you read this, you will have to enter in the contract address manually. Click the custom token tab. See step 12 for the contract address.
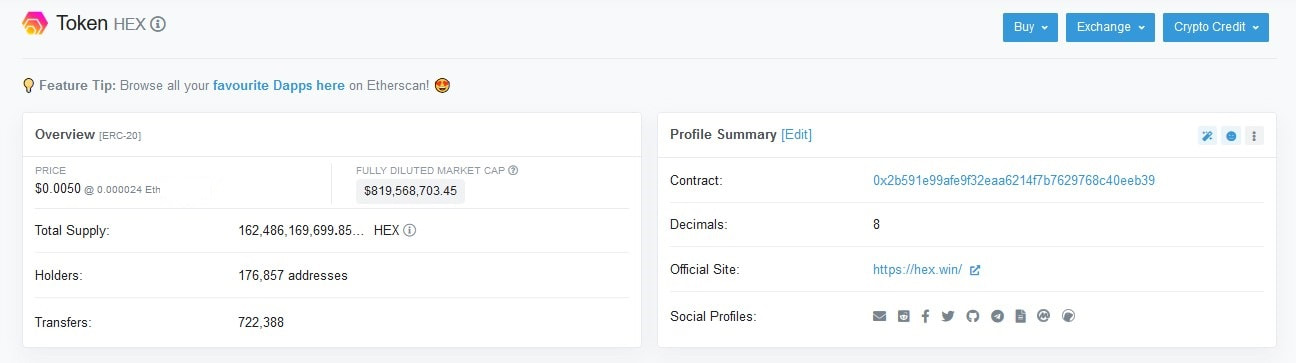
12. Input the HEX contract address. This should be viewable on etherscan, which is where I've copied and pasted it. I've also included an image of it down below. Good luck in your HEX journey and please be sure to click my referral link if you appreciated this tutorial!
Hex Token Contract: 0x2b591e99afe9f32eaa6214f7b7629768c40eeb39
Hex Token Contract: 0x2b591e99afe9f32eaa6214f7b7629768c40eeb39
IF YOU FOUND THIS HELPFUL, PLEASE CLICK HERE TO GET YOUR 10% BONUS HEX IN THE ADOPTION AMPLIFIER THROUGH MY REFERRAL LINK AND BE SURE TO CHECK OUT THE REST OF MY WEBSITE FOR MORE AMAZING RESOURCES. HAPPY HEXING!